

What is Favicon?
Favicon (short for 'favorites icon'), also known as a website icon, a page icon or an urlicon, is an icon associated with a particular website or webpage or webblog.
 You can create such an icon, and many recent web browsers can then make use of them. Browsers that support favicons may display them in the browser's URL bar, next to the site's name in lists of bookmarks, and next to the page's title in a tabbed document interface. Not all browser support this feature, but it works with firefox.
Here are some steps that you can try to personalize your blog favicon. The example here I use blogger.com, but you can try this for other blog platform which support blog html template editing.
First Step, provide a picture with ico or png extension (ex: picture.ico or picture.png) which you will use as your webpage favicon and preserve the picture in image hosting service.
To provide ico or png picture, you can make it from any picture format such as jpg, gif and png as you desired and convert it to ico or png format which can be done with any picture editing software. But don't worry if you don't have it, there is an easy way to make icon picture to be used as your favicon, you can use a free service from www.htmlkit.com. Here are the steps:
- Go to site http://www.html-kit.com/favicon
*stick a pie inside red mark circle
- Click "Browse" button to choose your desired favicon picture from your pc or laptop.
- Click "Generate Favicon.Ico" button, then the page will be:

- Your favicon has been generated now. Click "Download Favicon" button to save it to your pc/laptop but it still in zip file so you have to extract the zip file. The icon file usually has a name "preview_16x16.png".


You've had the favicon picture stored in your pc/laptop, now you have to store this picture to the image hosting service, here I recommend you to use free image hosting service from "http://photobucket.com". Here are the steps:
- Go to http://photobucket.com
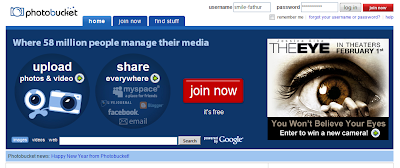
- Login or create an account if you don't have it yet by click the "Join now" button, log in to your account after finishing the sign up process.
- In your photobucket page account, there is a form to upload your image to their server like this:

- Click "Browse" button and point to favicon file stored in your pc/laptop, in this case is "preview_16x16.png" then click open.
- Add a favicon title if you wish and then click "Upload Button".
- When the file upload finished, you will have the stored image page like this:

- Copy the address link inside "Direct Link" box to safe place, or you can paste it first to notepad. This is the example of this blog favicon link address from direct link box: "http://i251.photobucket.com/albums/gg300/smile-fathur/preview_16x16.png"


Second Step, inserting the favicon code to your blog template.
- Log in to your blog account and go to template page and choose an option where you can edit your html template code. In "blogger.com" template page click the "Edit HTML" tab.
- In html editor place, go to line just below head html script code and type in the favicon script code there like this:
 favicon script code format:
XXX refers to favicon link address from image hosting in this case from photobucket.com
is "http://i251.photobucket.com/albums/gg300/smile-fathur/preview_16x16.png".
You just have to change that link (XXX) address with yours. - Save the template and view your blog in new tab or window.


Bingo! Now you have your blog with your new personal favicon. It's easy, isn't it? Have a nice try!


No comments:
Post a Comment